How to Add a Survey
A Survey in ReviewStream is a landing page designed to collect feedback from your customers. Surveys are commonly used when you're offering a giveaway—such as a product or coupon—in exchange for a review.
Step-by-Step Instructions
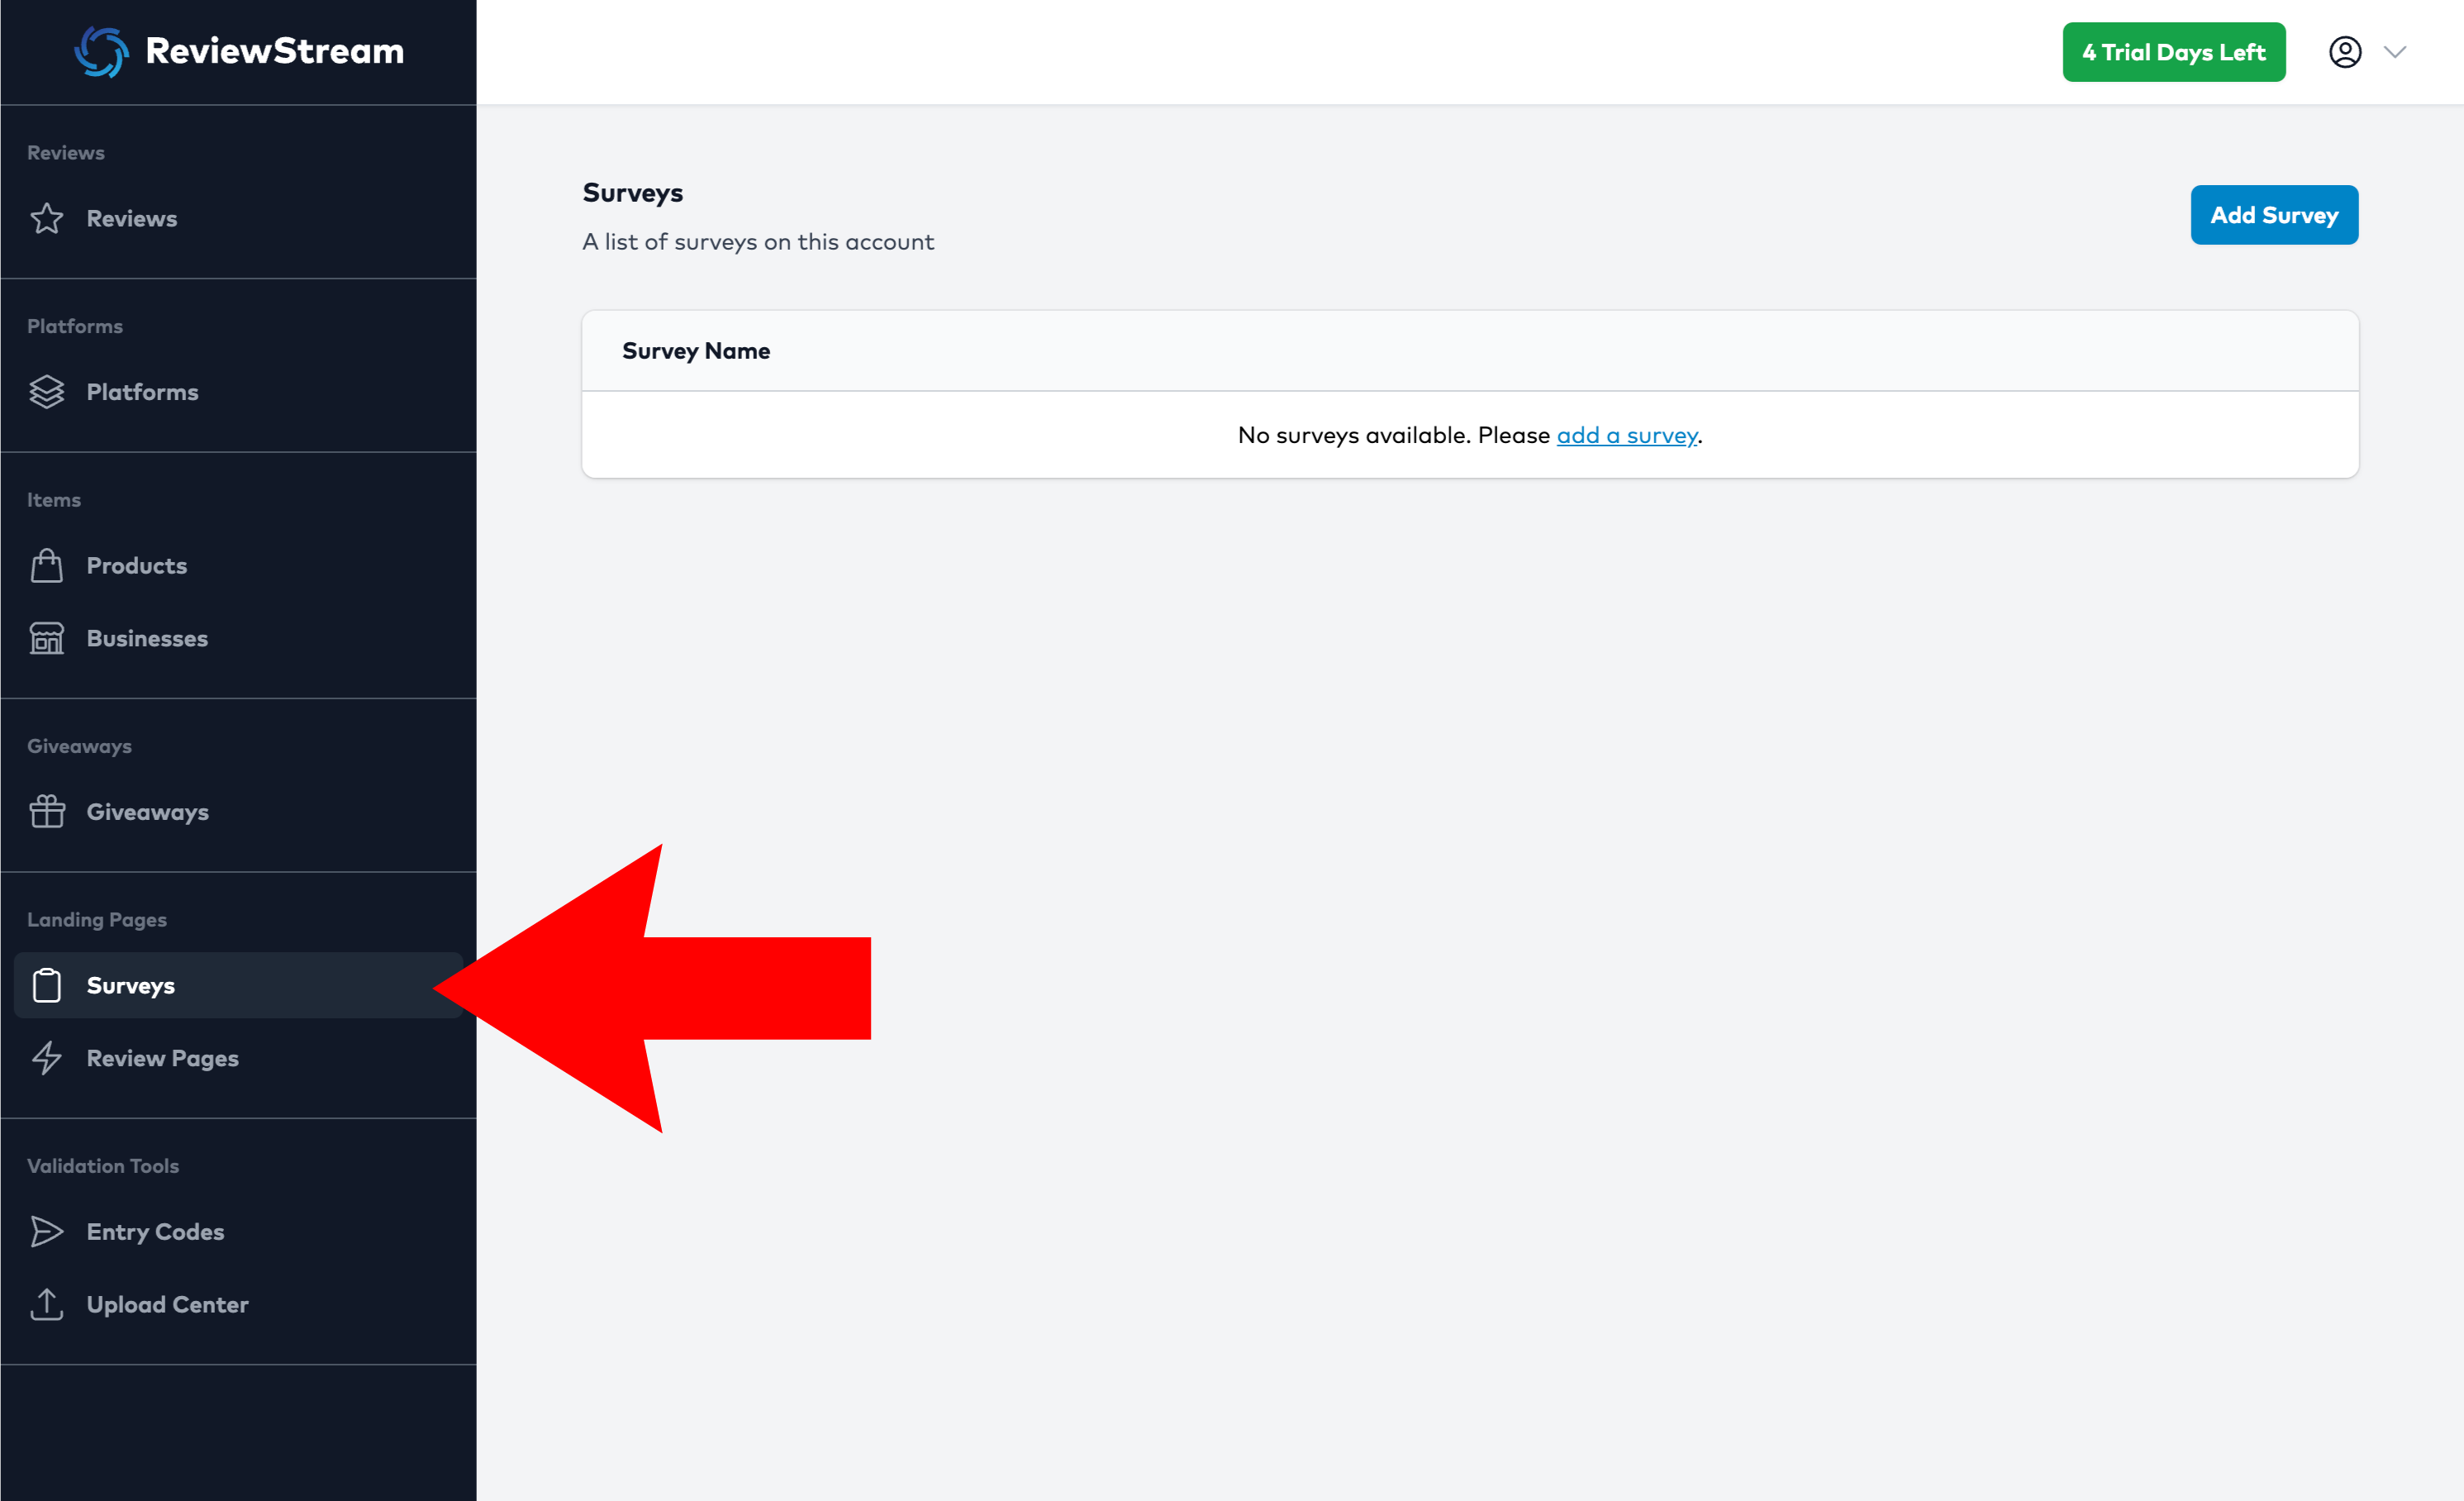
1. Select "Surveys" In The Left-Hand Navigation
In the left-hand navigation, select "Surveys"
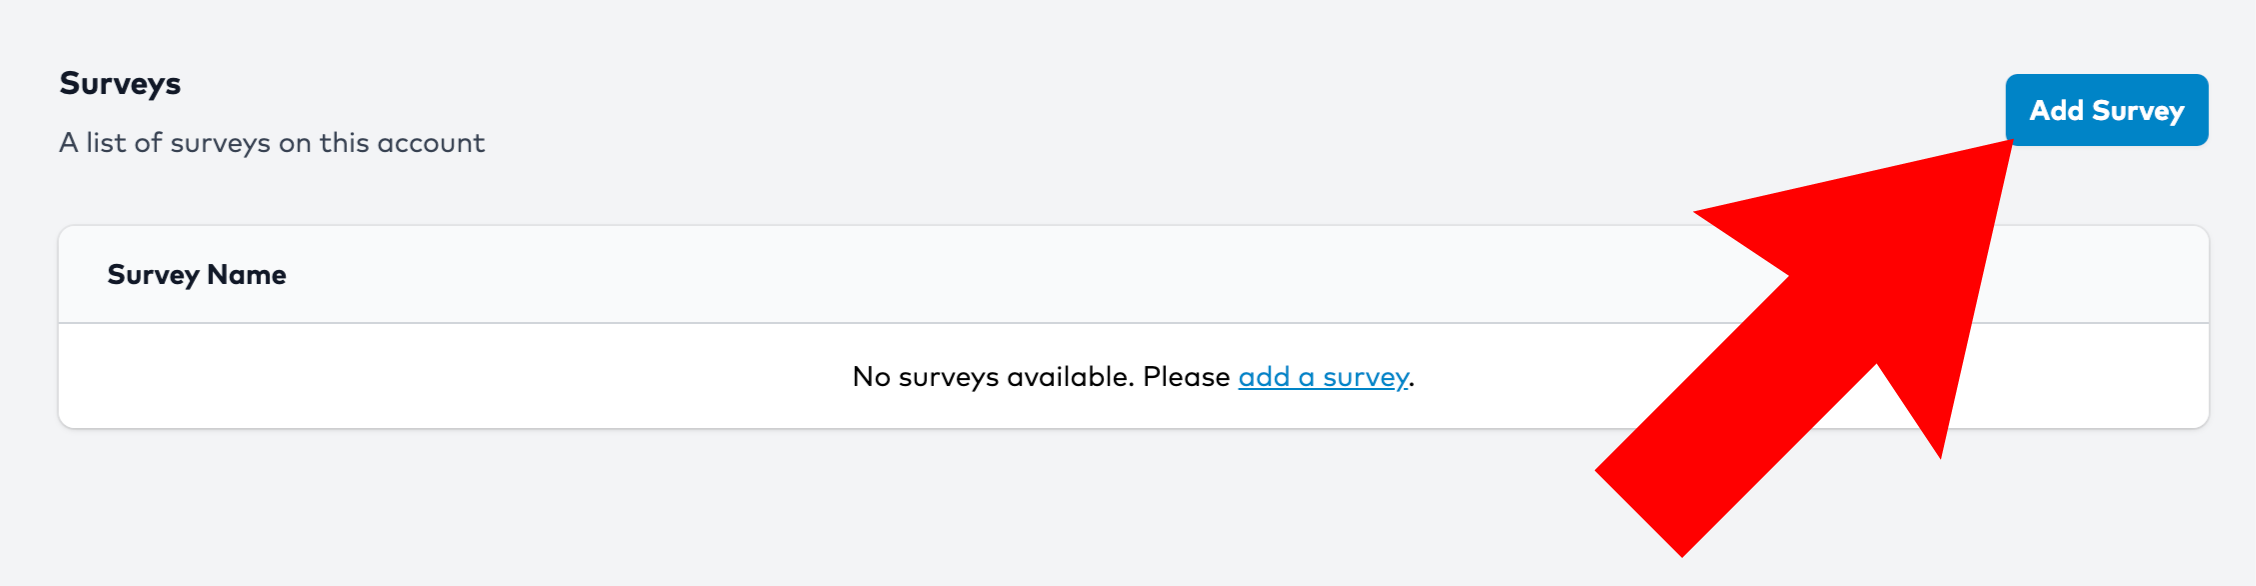
2. Click the “Add Survey" Button
You’ll see a list of all currently active surveys on your account. Click the “Add Survey" button to add a new survey.
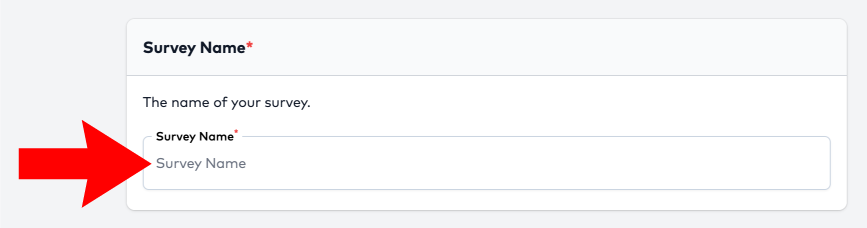
3. Name Your Survey
Provide a name for your survey.
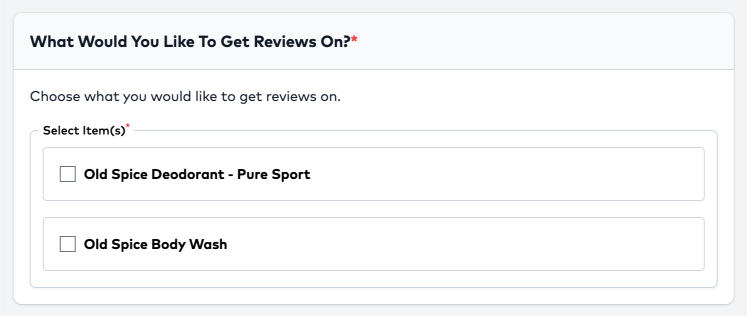
4. What Would You Like To Get Reviews On?
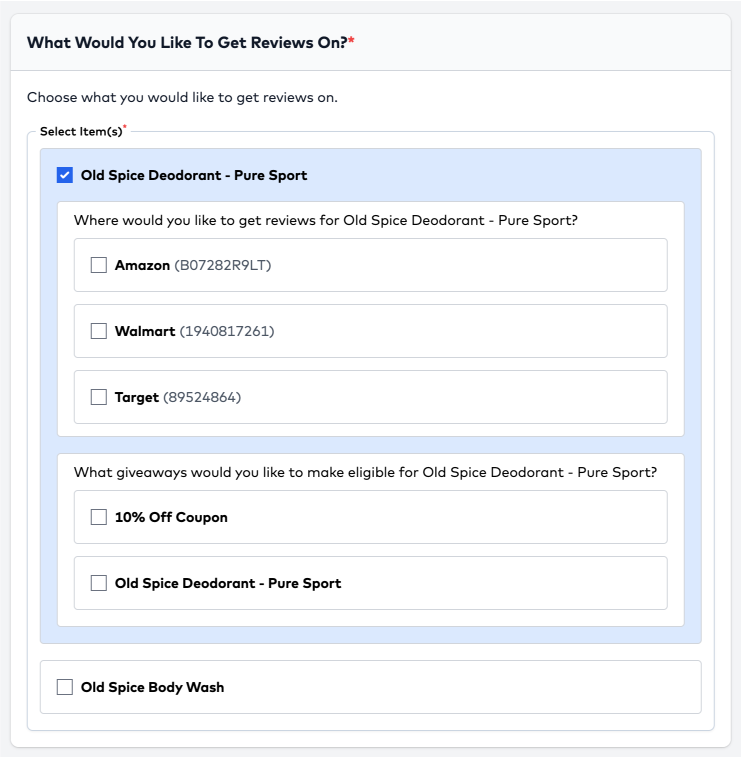
In this step, you are assigning items for your respondent to review. What this means is for this survey, what items would you like your respondent to review? If you select multiple items, your respondent will be asked to select which item they had an experience with. If only one item is selected, the survey will say "You had an experience with [selected item]"
-
Configure Item Platforms & Giveaways
After selecting the items that you'd like to make eligible for this survey, you need to define where you'd like to collect reviews for the selected items, along with what giveaways you'd like to make eligible. Every item on every survey can have a unique set of review platforms and giveaways. The review platforms available on the item are the review platforms that were added to the item in the item creation step, and the giveaways available on the item are a list of all giveaways available on the account. If you select multiple platforms, you are asking the respondent to provide a review on every selected platform. If you select multiple giveaways, your respondent will be shown a dropdown where they can choose one giveaway from a list of every selected giveaway.
Once you select a platform, an additional settings panel will show asking if you'd like to require your respondent to click off to the platform before being allowed to proceed through the survey. By requiring your respondent to click off to the platform, they will not be allowed to proceed to the next step of the survey until they click the "Review on [platform]" button. This is illustrated in the graphic below.
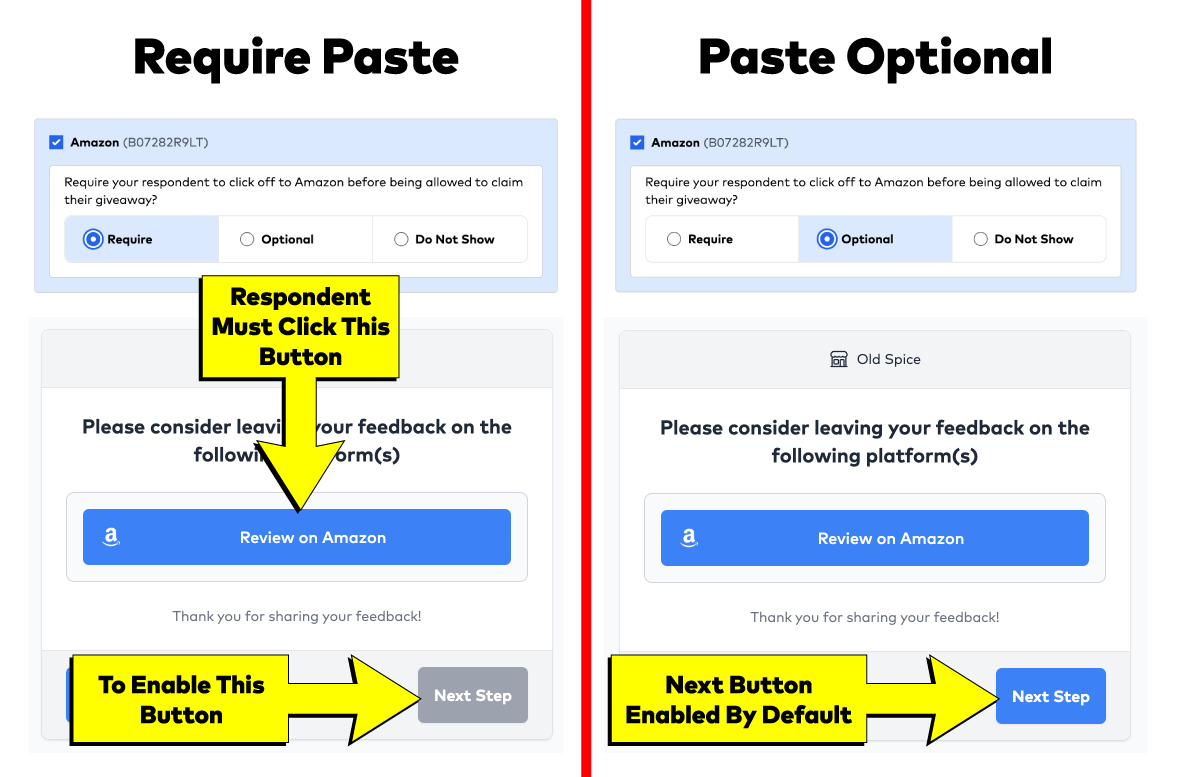
The "Do Not Show" option means that the "Review on [Platform]" button will not show for the platform with this setting enabled.
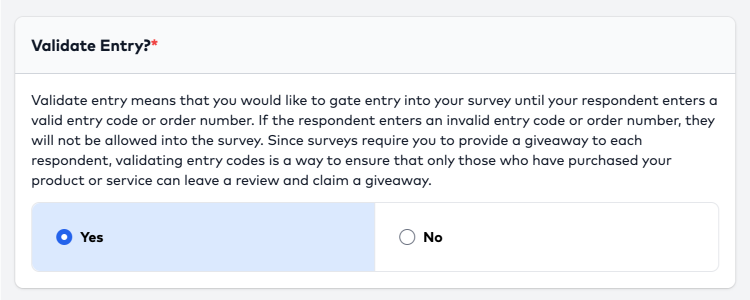
5. Validate Entry
Validate entry means that you would like to gate entry into your survey until your respondent enters a valid entry code or order number. If the respondent enters an invalid entry code or order number, they will not be allowed into the survey. Since surveys require you to provide a giveaway to each respondent, validating entry codes is a way to ensure that only those who have purchased your product or service can leave a review and claim a giveaway. Entry Codes and Order Numbers are created under the Validation Tools section in the left navigation. If you select "Yes", you are saying that you would like your respondent to enter an order number or entry code. If you select "No", your respondent will not be asked for an order number or entry code.
6. Rating Settings
On your survey, you have the ability to require, make optional, or not show the rating widget.

The rating widget is what the customer uses to provide their star rating on your product or service. Similar to how you set the "Require Paste" requirement on the platform in step 4, the rating requirement in this step works much the same. There are 3 sections in the rating settings:
-
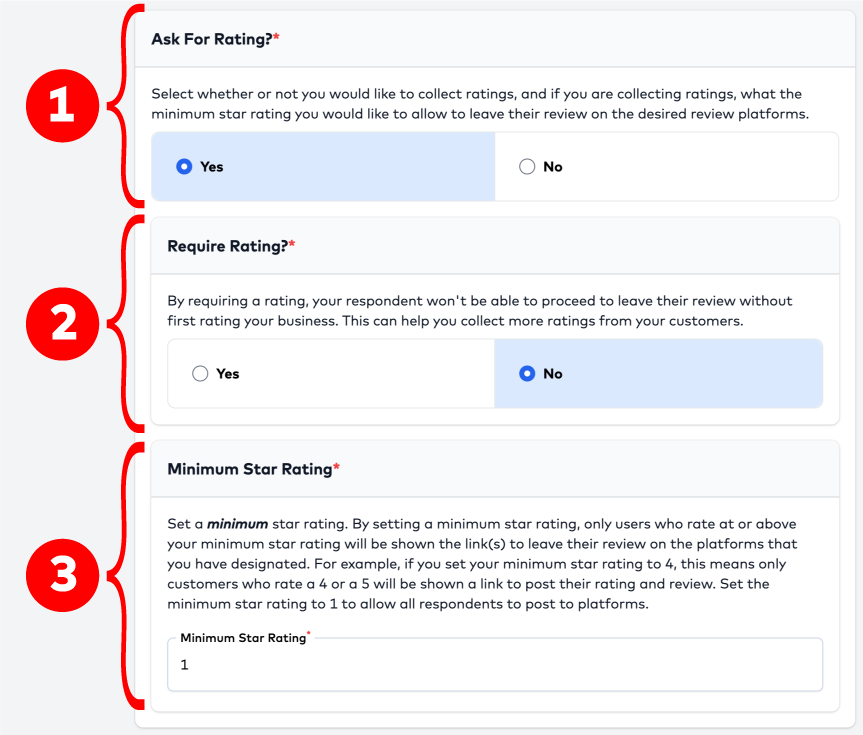
Ask For Rating
By selecting "Yes", you are saying that you would like to ask your respondent for their star rating. If you select "No", your respondent will not be shown the star rating widget.
-
Require Rating
If you select "Yes" on require rating, your respondent will be required to provide their rating in order to proceed to the next step of the survey. If you select "No", the star rating widget will be shown, but your respondent will not be required to provide a star rating in order to proceed to the next step of the survey.
-
Minimum Star Rating
If your respondent has a bad experience with your product or service, this may be a result of things out of your control, i.e. the courier crushed the box that was shipped to your customer. This is not a reflection of your business, but your customer doesn't know that. So rather than allowing their 1-star rating to be posted to the platform to become permanent record, you are able to intercept this respondent's rating and address their issue before their review is posted to the platform. For example, if you set your minimum star rating to 4, you are allowing anyone who rates their experience a 4 or a 5 to be allowed to paste their review to the platform(s) that you have designated. If the respondent rates their experience a 3 or below, they will bypass the "Review on [platform]" step and go straight to the giveaway selection step. All respondents, whether they had a positive or negative experience, will be allowed to claim a giveaway.
6. Review Settings
On your survey, you have the ability to require, make optional, or not show the rating widget.
The rating widget is what the customer uses to provide their star rating on your product or service. Similar to how you set the "Require Paste" requirement on the platform in step 4, the rating requirement in this step works much the same. There are 3 sections in the rating settings:
-
Ask For Rating
By selecting "Yes", you are saying that you would like to ask your respondent for their star rating. If you select "No", your respondent will not be shown the star rating widget.
-
Require Rating
If you select "Yes" on require rating, your respondent will be required to provide their rating in order to proceed to the next step of the survey. If you select "No", the star rating widget will be shown, but your respondent will not be required to provide a star rating in order to proceed to the next step of the survey.
-
Minimum Star Rating
If your respondent has a bad experience with your product or service, this may be a result of things out of your control, i.e. the courier crushed the box that was shipped to your customer. This is not a reflection of your business, but your customer doesn't know that. So rather than allowing their 1-star rating to be posted to the platform to become permanent record, you are able to intercept this respondent's rating and address their issue before their review is posted to the platform. For example, if you set your minimum star rating to 4, you are allowing anyone who rates their experience a 4 or a 5 to be allowed to paste their review to the platform(s) that you have designated. If the respondent rates their experience a 3 or below, they will bypass the "Review on [platform]" step and go straight to the giveaway selection step. All respondents, whether they had a positive or negative experience, will be allowed to claim a giveaway.
6. Click “Save”
Once all required fields are filled out, click Save. Your new product will now be available for assigning to landing pages.
Tips
- Rather than creating multiple of the same products in ReviewStream, create one product and assign multiple platforms to it. Doing this will reduce clutter and confusion around which platform is assigned to which product.
- You can reuse the same product across all of your landing pages. When you assign a product to a landing page, you will be able to select which platforms you would like to make active for that landing page.
- If you're unsure where to find platform-specific details, click the “Where do I find this?” link next to the input field.
Next Step
After you've added one or more products, you can assign them to a survey or review page to begin collecting reviews.